By default, MoodleCloud sends automated emails (like password resets and course reminders) from a default Moodle address (e.g., noreply@yoursite.moodlecloud.com). If you have a custom domain and want these emails to come from your own address instead, you can connect your external email account to your Moodle site.
Note: MoodleCloud provides the interface to connect your mail, but we do not host your email. If something isn't working, please contact your email provider to verify your connection settings (called SMTP credentials).
Overview of the steps
- Gather what you will need from your email provider
- Set up Moodle to send emails from your custom domain
- Send yourself a test email to make sure it’s working
Step 1: Gather what you will need from your email provider
To send emails from your custom domain, you must have an external mail service. You will need the following details from your email provider:
- SMTP host: The server address used for sending mail.
- Port number: The number used to connect (e.g., 465 or 587).
- Security type: The type of protection used (None, SSL, or TLS).
- Username and password: The login details for your email account.
Step 2: Set up Moodle to send emails from your custom domain
Once you have your mail server details, log in to your MoodleCloud site as an administrator and follow these steps:
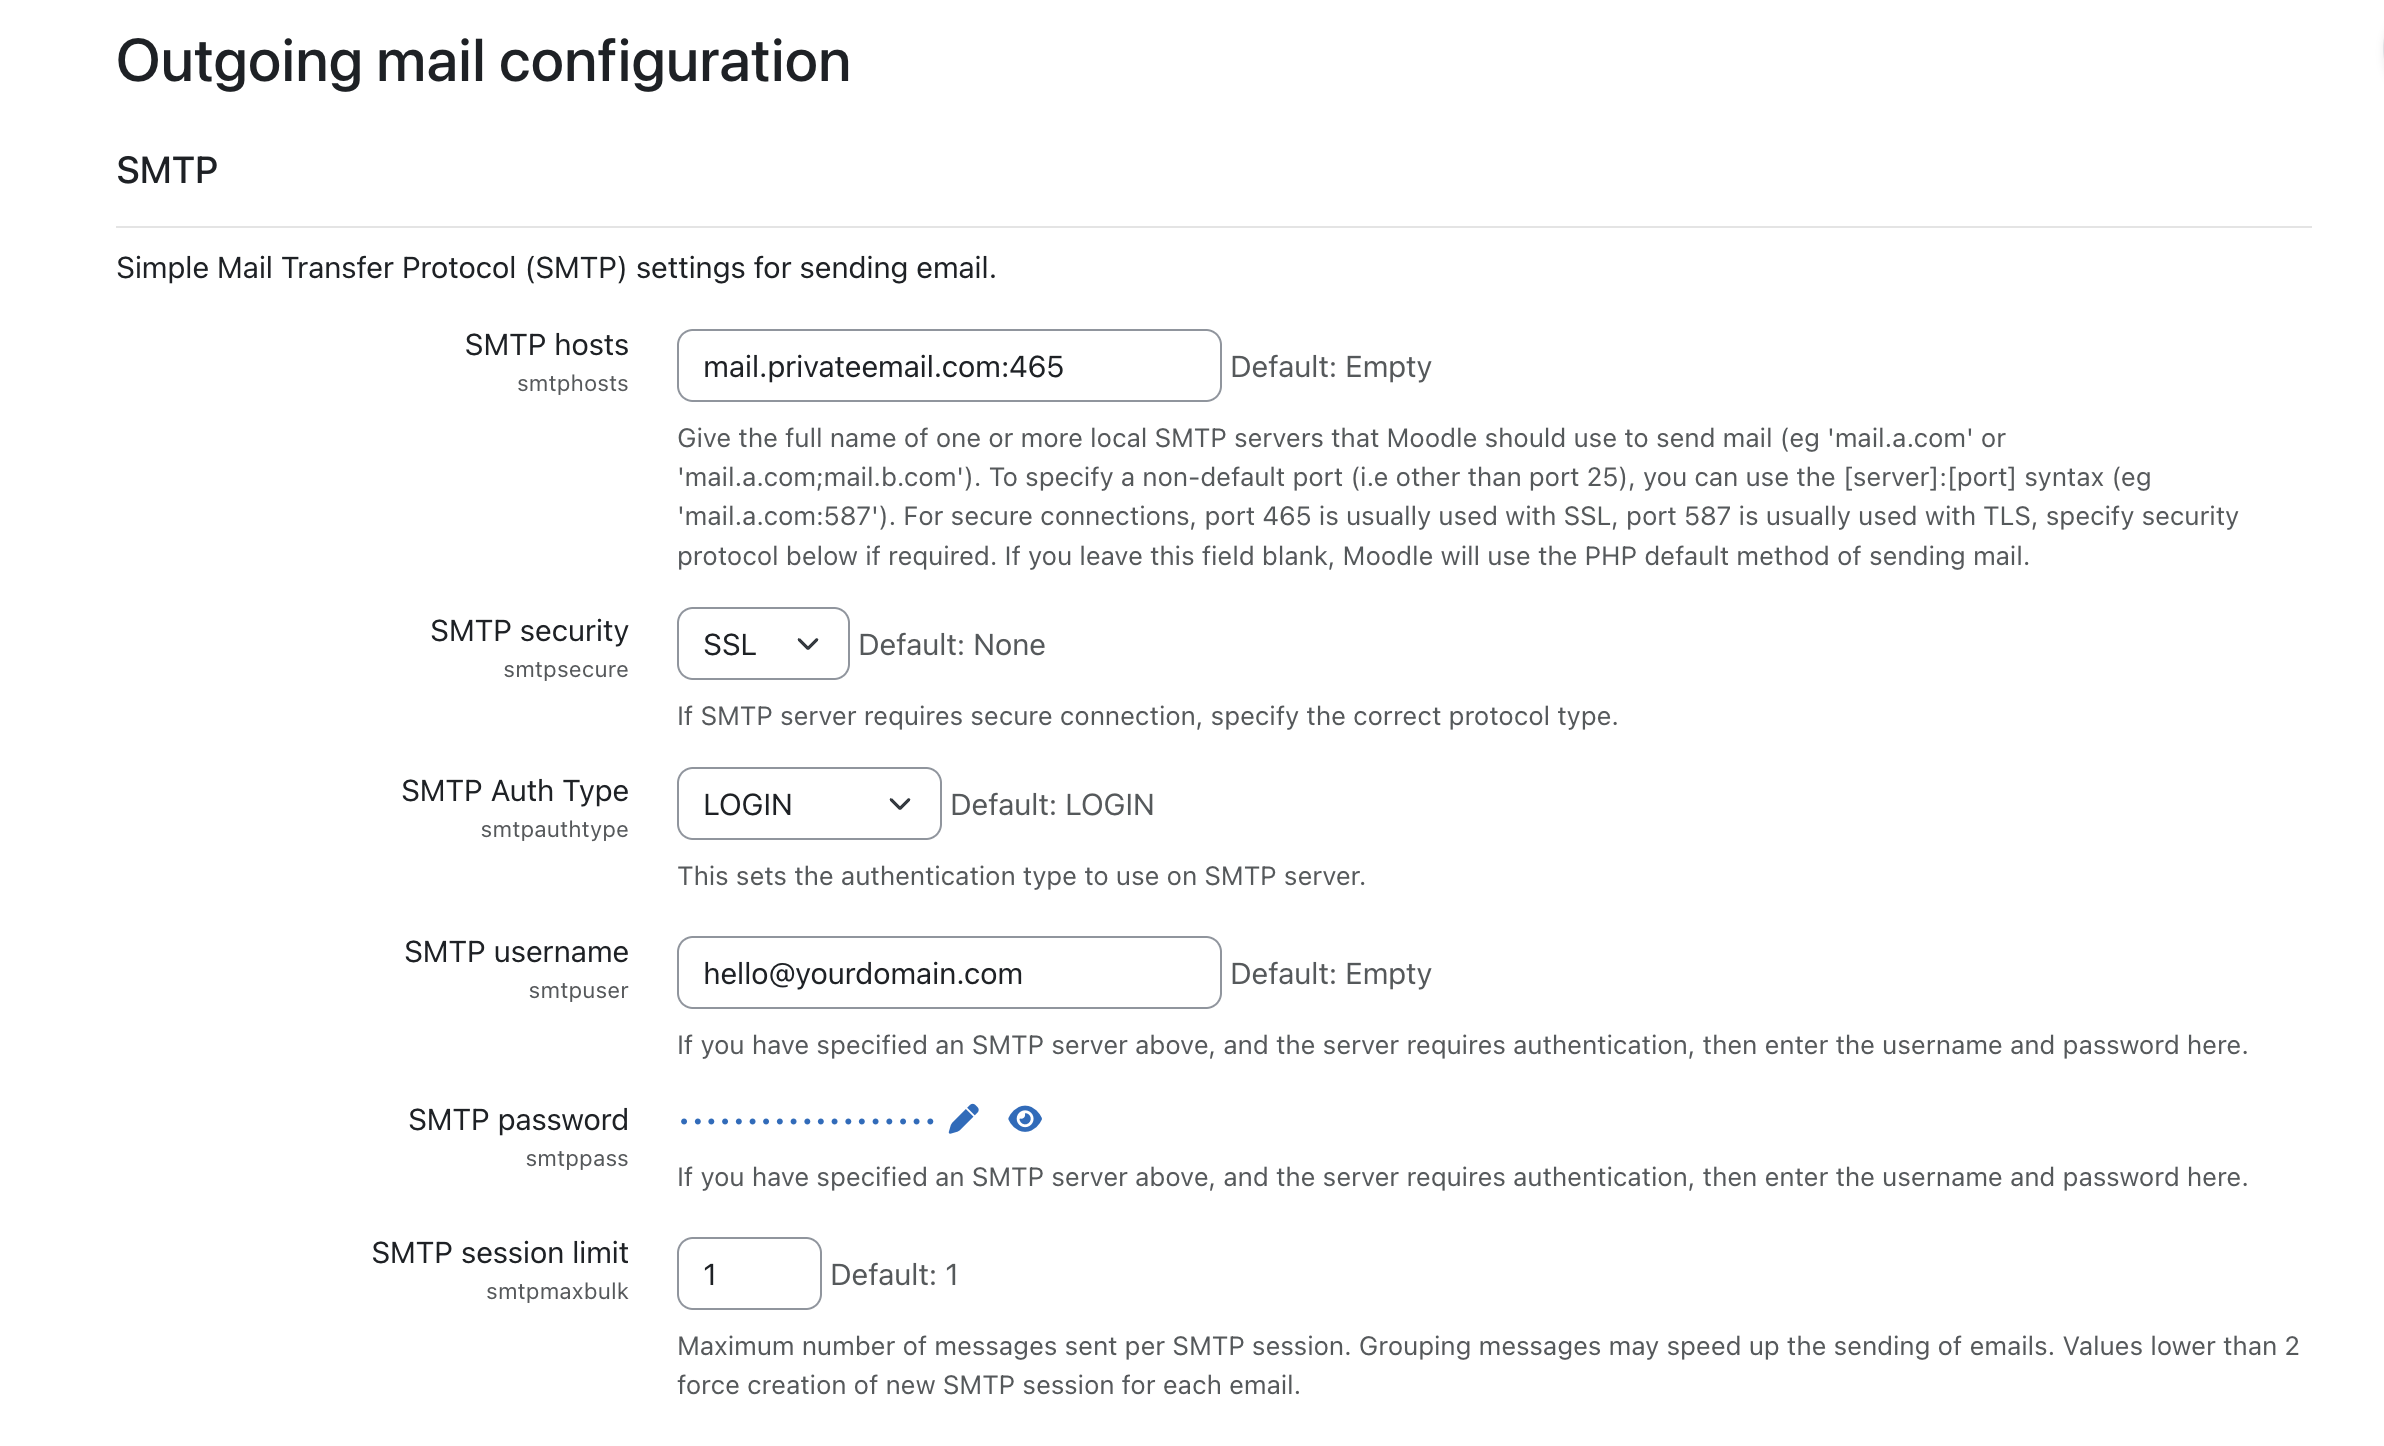
- Go to Site Administration > Server > Email > Outgoing mail configuration.
- Enter your SMTP host followed by the port number (e.g. smtp.example.com:465).
- Select the correct security type provided by your host.
- Enter your email account username and password.
- In the No-reply address field, enter the email address you want recipients to see. This does not need to match your subdomain (e.g., if your custom domain is learn.yourdomain.com, you can still use noreply@yourdomain.com).
- Save the settings by clicking the Save button at the bottom of the page before proceeding to the next step.
Step 3: Send yourself a test email to make sure it’s working
It is important to verify that your settings are correct so that your users don't miss important notifications:
- Scroll to the Test outgoing mail configuration section of the Outgoing mail configuration page.
- Click the Test outgoing mail configuration link.
- Enter your own email address and click Send a test message.
If the setup is working correctly, you should receive the test email.
*Notifications are not always instant: standard automated emails, such as course reminders, forum posts, and glossary comments, are processed by the cron service.Was this article helpful?
That’s Great!
Thank you for your feedback
Sorry! We couldn't be helpful
Thank you for your feedback
Feedback sent
We appreciate your effort and will try to fix the article